Creating a Workspace in Mirorim
What is a Mirorim Workspace?
A workspace in Mirorim is your dedicated area for project management. Create a workspace on the Mirorim application or website to harness a suite of project management tools.
How to Create Your Workspace in Mirorim
Creating and managing Mirorim workspaces is a breeze. Follow these simple steps to set up your workspace, invite team members with varying permissions, and organize your projects into boards and lists. Collaboration and organization have never been easier with Mirorim’s intuitive features.
Step 1: Access Workspace Creation
- Make sure you have the Mirorim application installed or visit our website to sign up for an account.
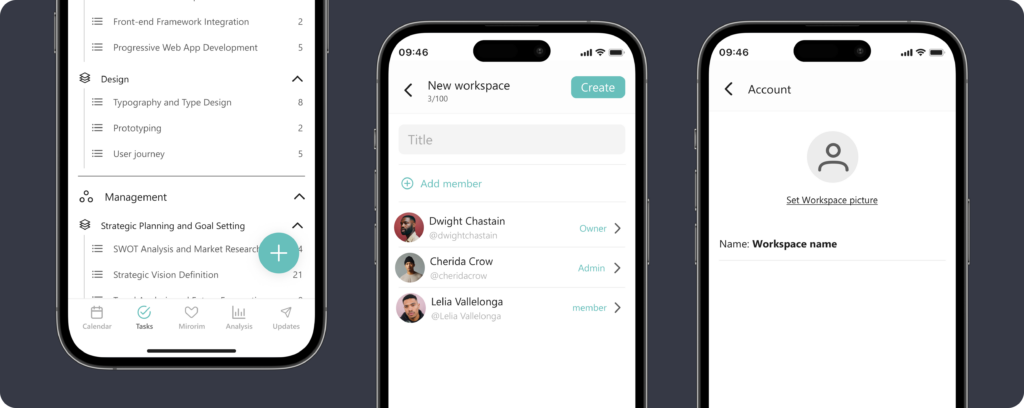
- Once logged in, click on the ‘Tasks‘ button – the central hub for Mirorim’s productivity features.
- Tap on the ‘Plus Icon’ and select ‘Workspace’
Step 2: Add a Name for Your Workspace
- Give your workspace a name. Choose something descriptive that reflects its purpose or theme, making it easy for you and your team to identify and access.
Step 3: Add a Profile Picture
- Enhance your workspace’s visual appeal and recognition by adding a profile picture. It’s a small touch that can make a significant difference.

How to Add Team Members
After successfully creating your Mirorim workspace, it’s time to bring your team on board. Follow these straightforward steps to invite and manage team members:
Step 1: Access Your Workspace
Begin by accessing the workspace you’ve created in Mirorim.
Step 2: Invite Team Members
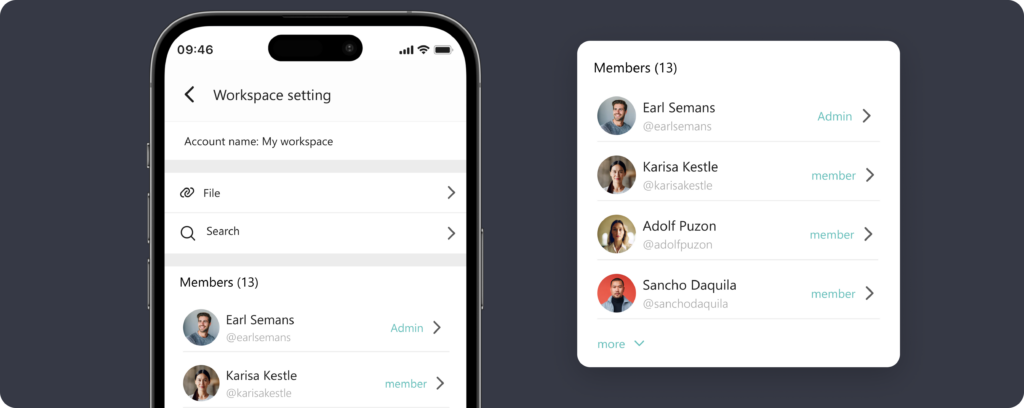
Click on the Add Members button within your workspace. This will prompt you to select the contacts you want to invite to your workspace.
Step 3: Set Permissions
As you invite team members, you have the flexibility to assign different permissions based on their roles and responsibilities
Admins have full control over the workspace. They can add, remove, and manage team members, boards, and tasks.
memberMembers can contribute to the workspace by adding and updating tasks, but they don’t have administrative privileges.
Guests have limited access and are typically suited for external collaborators or individuals who need partial access to the workspace.
By setting these permissions, you can effectively manage your workspace, ensuring that each team member has the appropriate level of access and control.
Now that you’ve invited your team members and configured their permissions, you’re all set to collaborate seamlessly within your Mirorim workspace. Explore the various features and tools to enhance your teamwork and productivity.

How to Create Boards and Lists on Mirorim
Once you have team members in your workspace, you can start creating boards and lists to organize your work. A board is like a big-picture view of your project, while lists are the individual steps or phases that make up the project.
Step 1: Create a Board
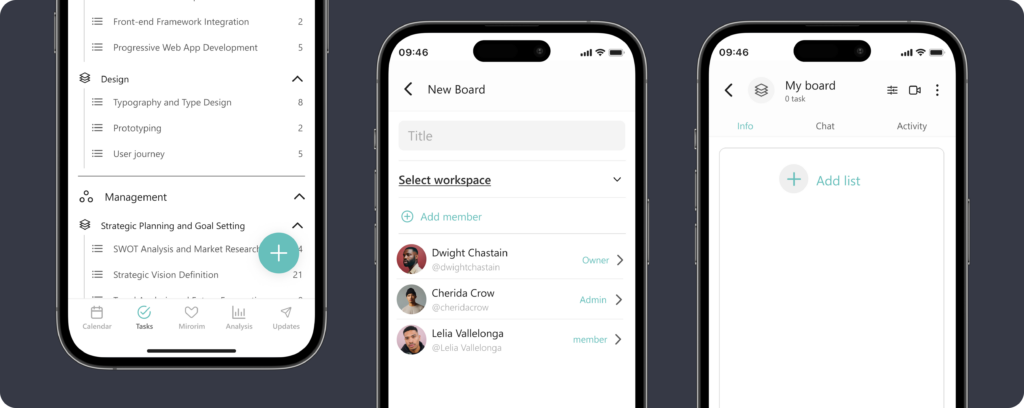
- Open the task tab.
- Tap on the ‘Plus Icon’ to initiate board creation.
- Choose the desired workspace where you’d like to create the board.
- Provide a clear and descriptive name for the board, reflecting the specific project or task.
- Include the relevant team members for this board.
Step 2: Add Lists to the Board
Now that you have a board, it’s time to break down your project into manageable steps or phases.
- Click on the board you created.
- Select ‘Add list’ to create a list.
By following these steps, you can efficiently create boards and lists within your Mirorim workspace, ensuring that your projects and tasks are well-organized and easy to manage.
